Create issues
Creating issues is the most common action taken in Linear.
Overview
Issues are the core unit of work and can represent anything a team needs to track, such as bugs, feature work, follow-up tasks, or internal requests.
Issues must belong to a single team and are given a unique issue ID number that is assigned in consecutive order of when it was created. They are required to have a title and a status.
Creating issues
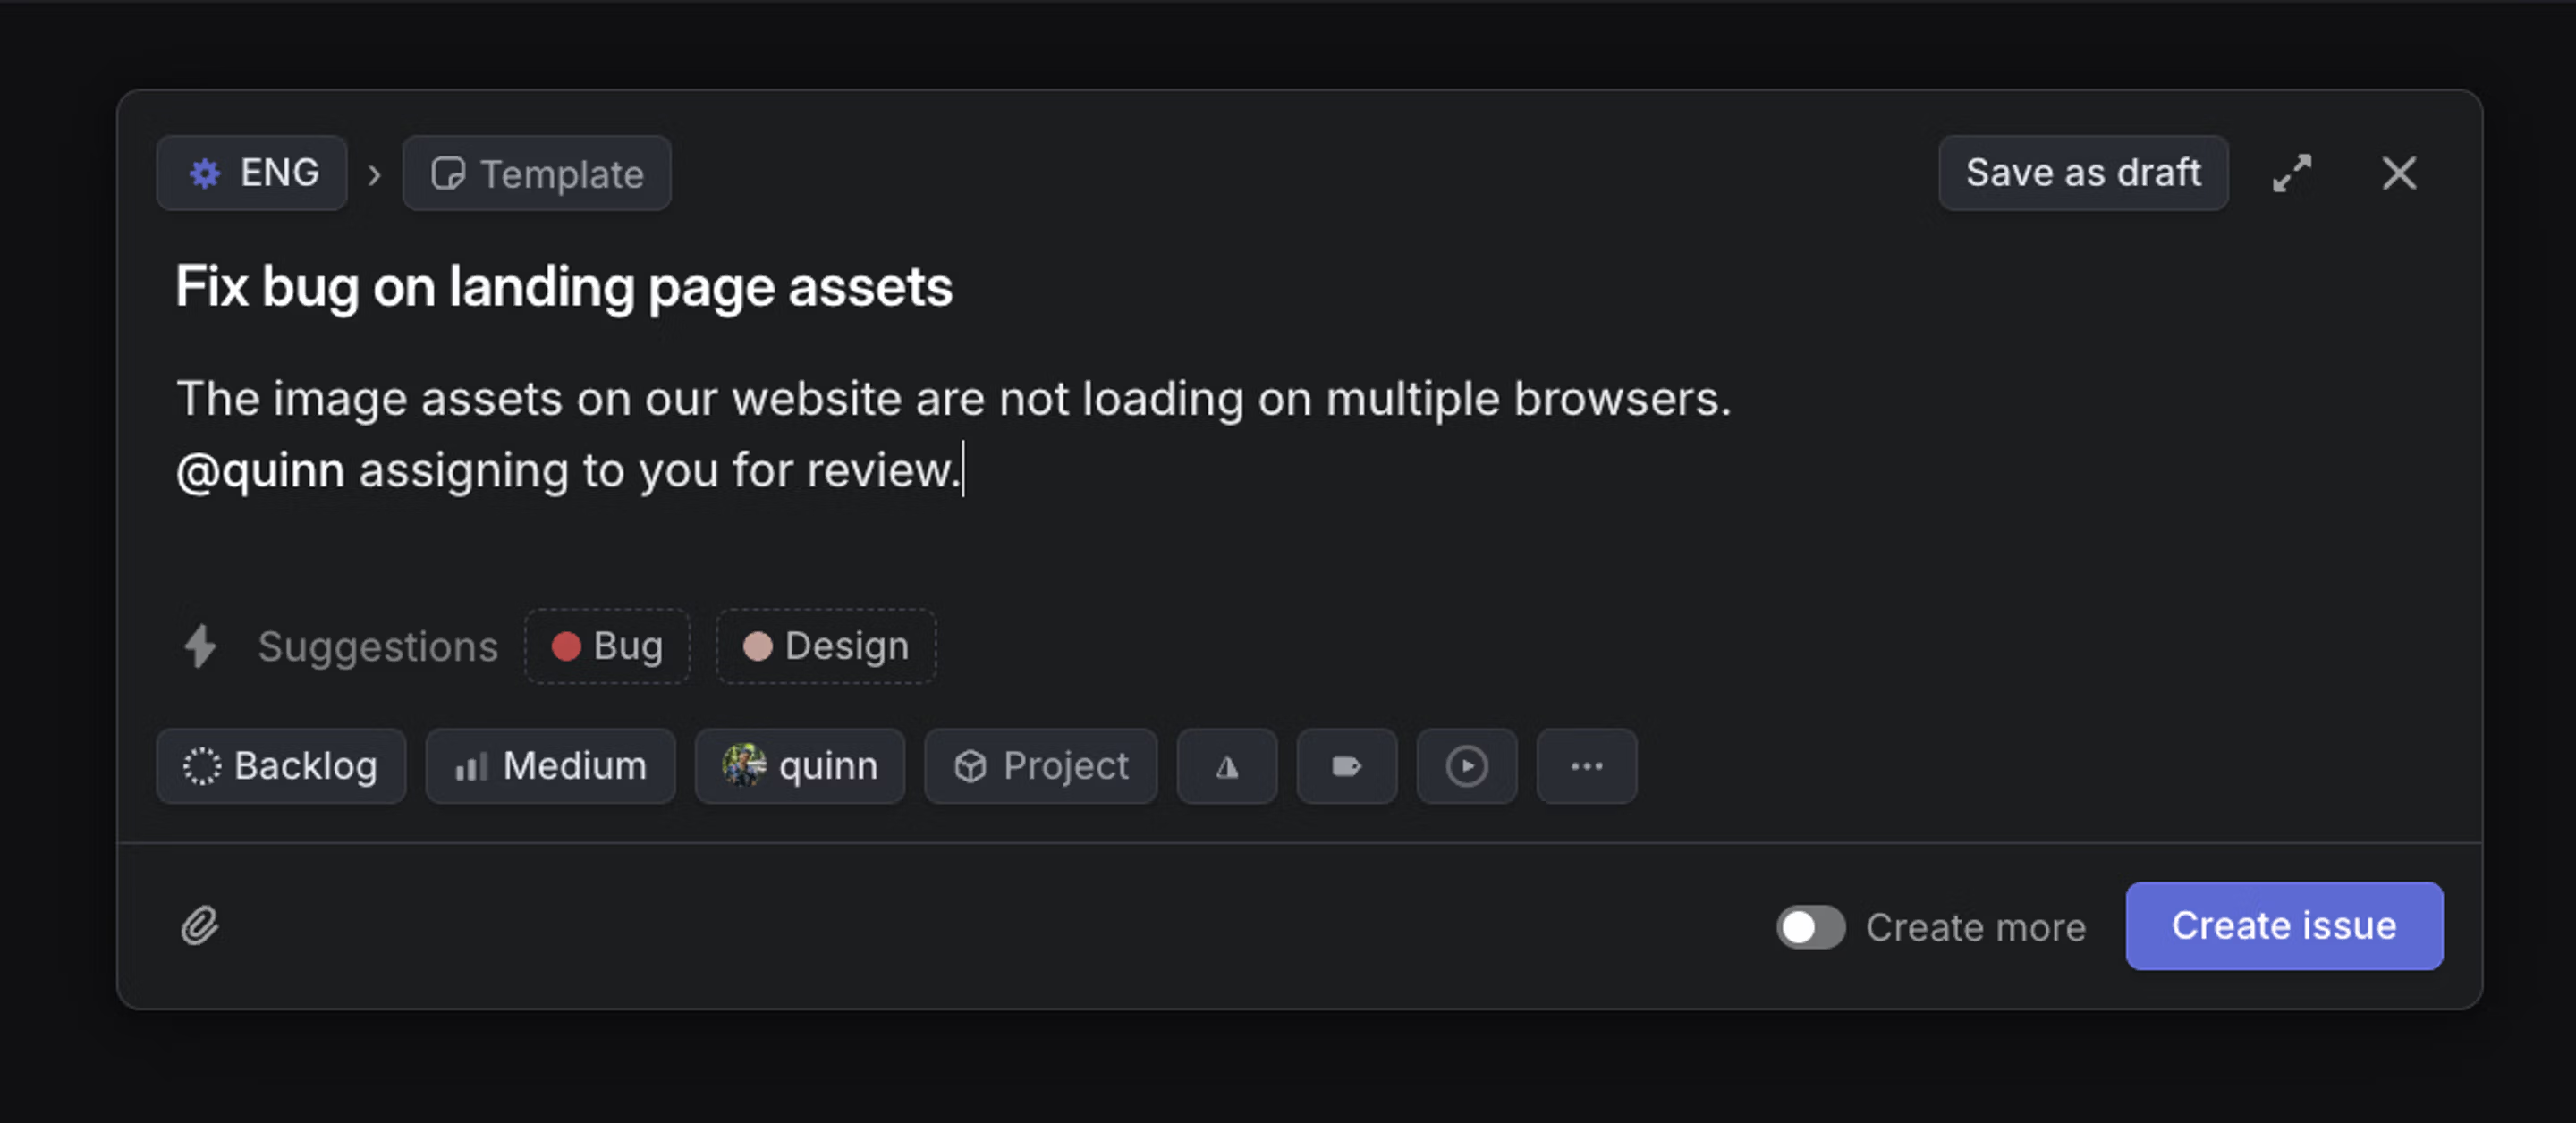
- Use the keyboard shortcut C to open up an issue creation modal
- Click the Create new issue icon in the upper left of the app
- To create an issue from a template, use Option/Alt C.
- Enter https://linear.new into your browser URL bar to create a new issue. It will redirect you to the new issue creation page as long as you are logged into your Linear account.
- Highlight text and click the Create issue from selection icon in the formatting bar
Changes made to an issue’s properties in the first 3 minutes are considered part of the issue creation process, and won’t be added to the activity log as changes to the issue.
Create an issue via email
To allow issues to be created without requiring an account in Linear, you can set up email intake by creating a custom email address for a team or for a team’s template.
When someone sends an email to one of the intake email addresses, they will not receive a confirmation or be notified when the issue is updated or resolved.
The submitted Linear issue will be included as an attachment on the Linear issue. Attachment files will be synced over, though email attachments are limited to 25 MB.
Refer to the Linear Asks feature for the ability to:
- Customize the email address you want requesters to send to
- Reply to customer emails from Linear
- Customize response emails
Team intake email
Navigate to Team settings > General > Create issues by email and enable the toggle.
Templated intake email
To create an email address for a team template:
- Navigate to Team Settings > Templates
- Click the three dots on the right of an issue template
- Select Configure email address
- Enable the toggle in the pop-up
When a team template is used, the issue’s title and description will be overwritten by the email contents, but the properties of the template will be applied to the new issue. Replies sent on the original email to the forwarding address will not create additional issues.
Create recurring issues
To automate your repeated tasks on a cadence of your choosing, you can choose to make it recurring:
- Open the issue composer
- Apply a template (optional)
- Click the … menu
- Select “Make recurring…”
Recurring issues can be found from your Team settings > Recurring issues.
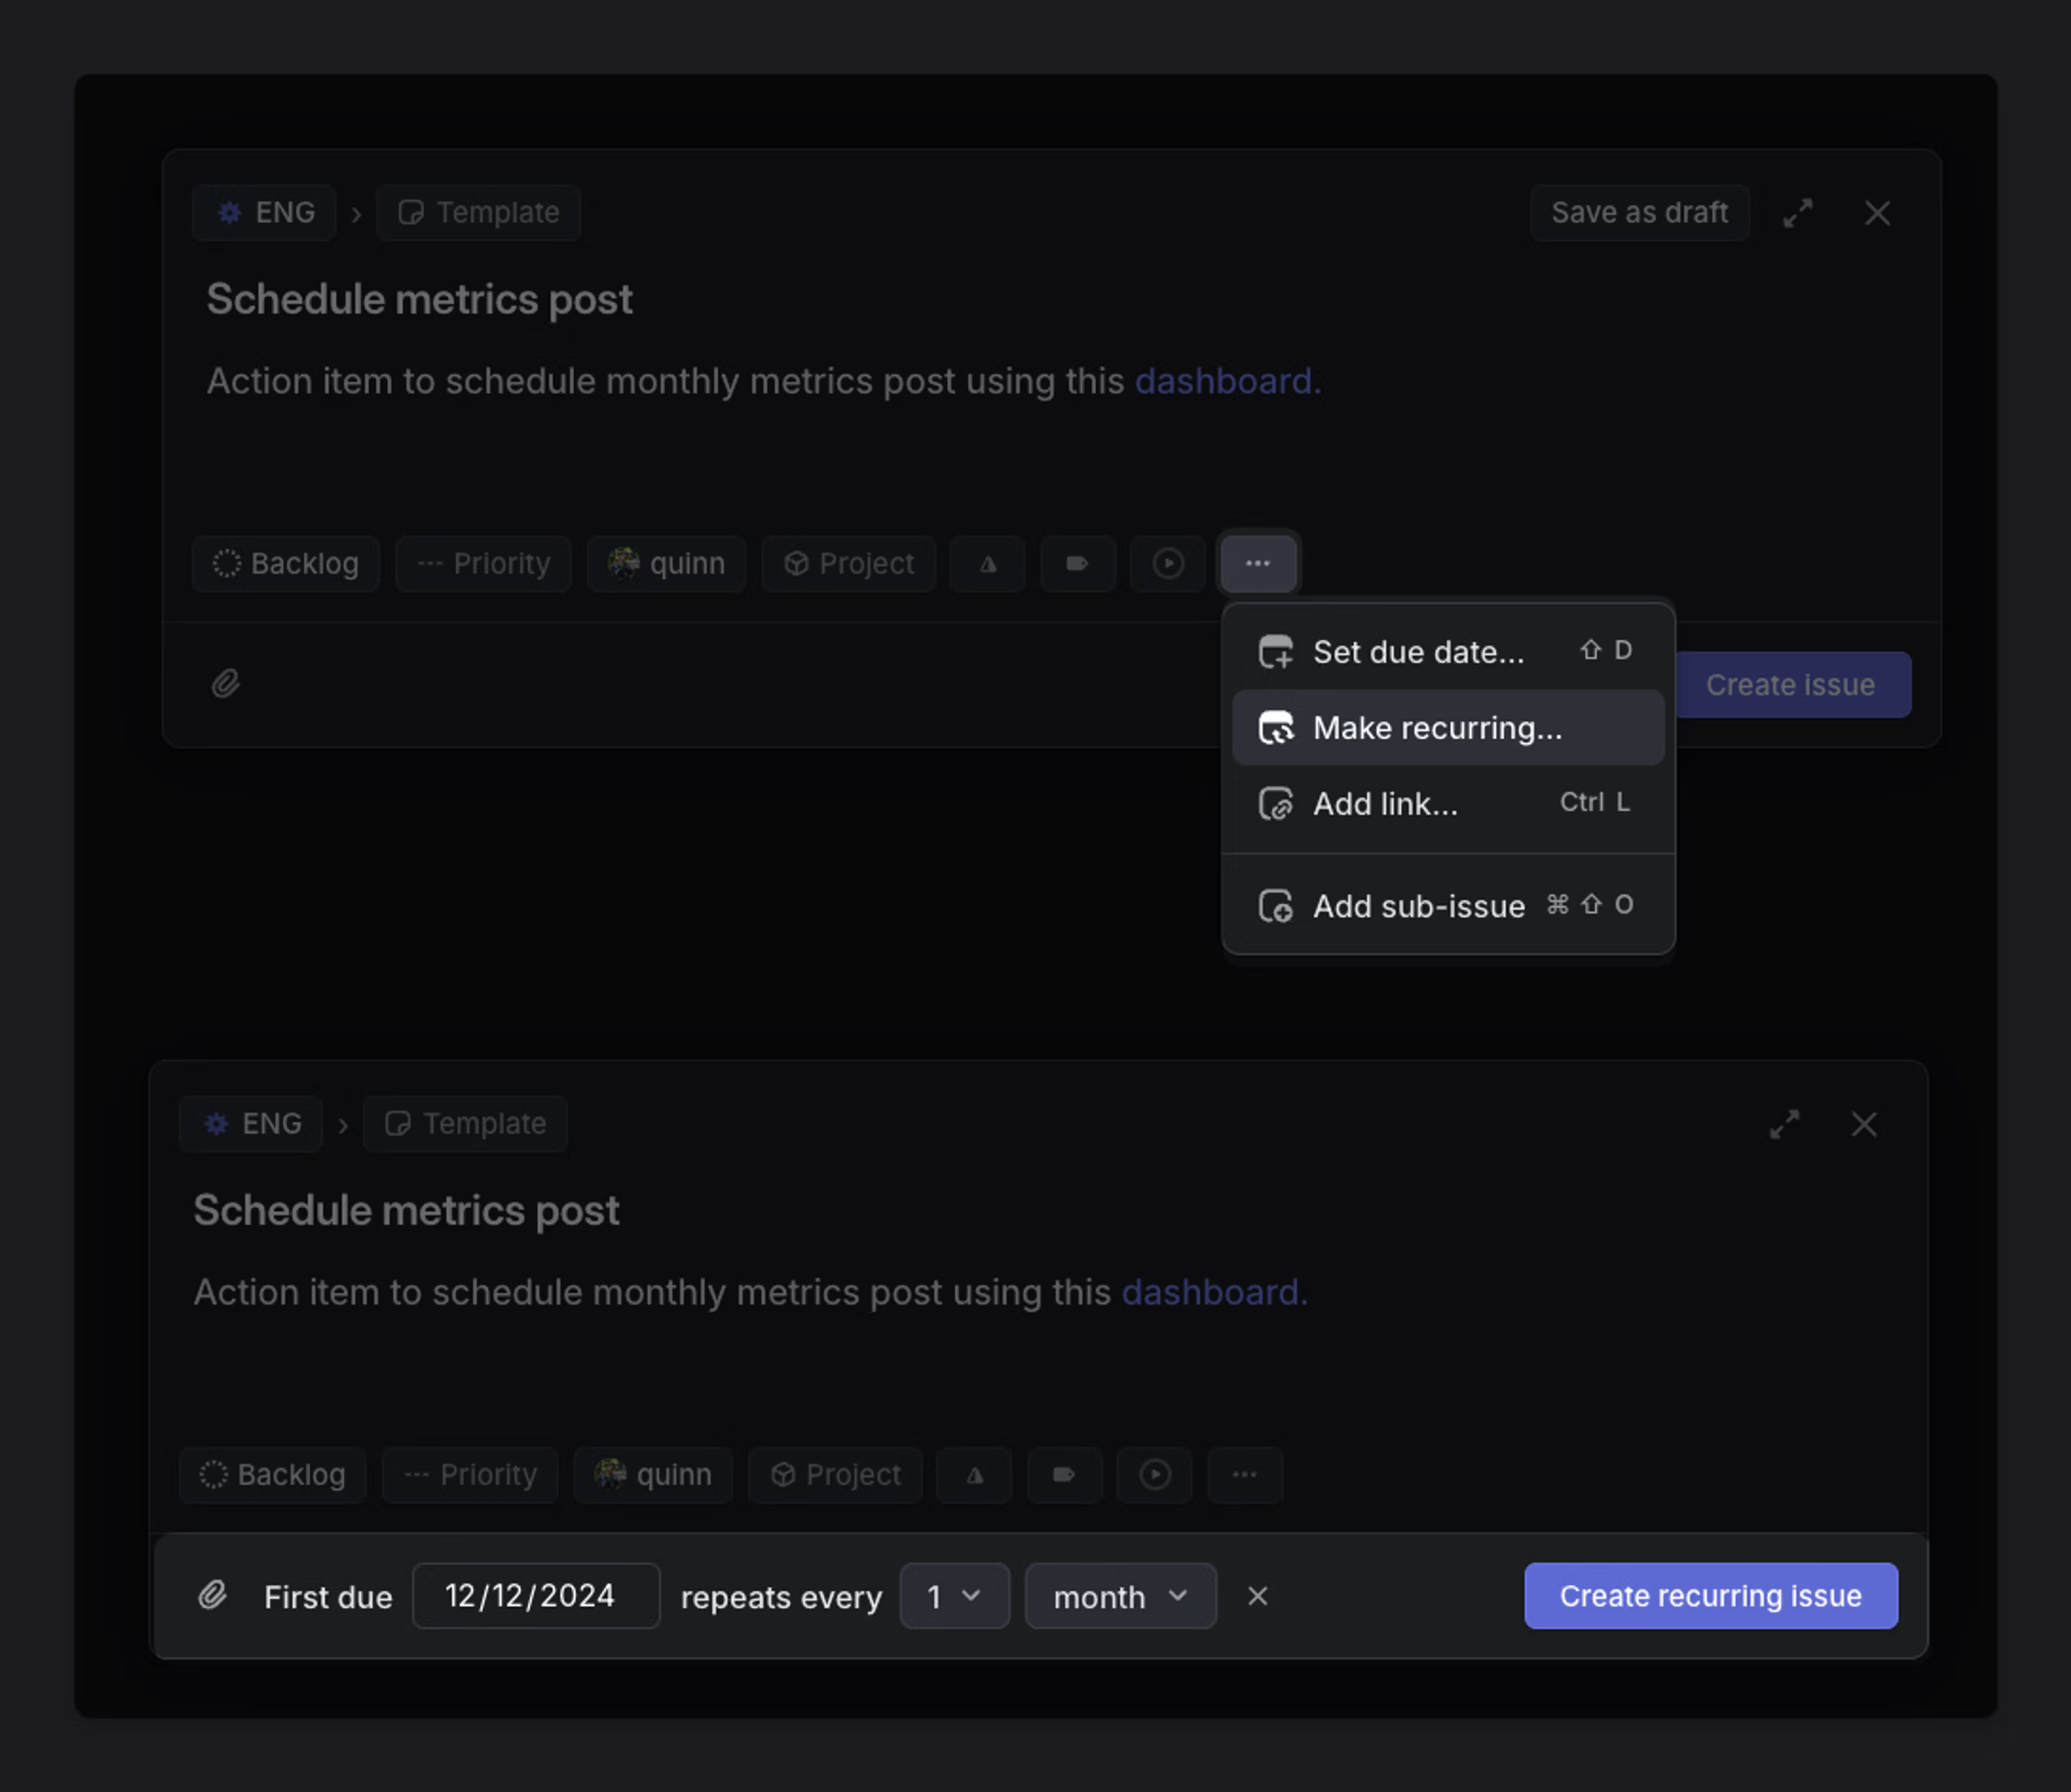
Once you create a recurring issue, future issues in the cadence are expected to be created once the due date passes (00:01 the following day in your team’s timezone.)
Changes to a template in future will not affect recurring issues that were created from this template. You will need to edit the recurring issue directly or recreate it from your updated template.
Convert an existing issue into a recurring issue
To convert any issue into a recurring issue, open the issue and in the … menu choose Convert into > Recurring issue…You can also use the Cmd/Ctrl + K menu by typing “Convert into recurring issue”.
You can then choose your first due date, and the cadence at which it repeats.
Create recurring issues from team settings
- Navigate to Team settings > Recurring issues.
- Click the icon and set your chosen schedule of recurrence
Create a new issue URL
The following links trigger the creation of a new Linear issue in any browser and you can add query parameters after any of them to pre-fill issue fields.
To pre-fill issue fields and/or properties:
- Add a
?at the end of the link - Include the field or issue property you want to pre-set
- Add
= - Add the parameter you are setting
- Use
&between each field or issue property when creating a string of pre-settings
Apply pre-set properties
We support the following query parameters:
Property | How to apply | Example |
|---|---|---|
Title and description | Use | https://linear.new?title=My+issue+title&description=This+is+my+issue+description |
Status | Can be set by | https://linear.new?status=Todo |
Team | Can be set by | |
Priority | Can be set by Urgent, High, Medium or Low | https://linear.new?priority=Urgent |
Assignee | Can be set by | https://linear.new?assignee=john https://linear.new?assignee=John+Smith https://linear.new?assignee=me |
Estimate | Can be set by their point number T-shirt sizes have the following point values: No priority (0), XS (1), S(2), M (3), L (5), XL (8), XXL (13), XXXL (21) | https://linear.app/team/LIN/new?estimate=2 |
Cycle | Can be set by | https://linear.app/team/MOB?cycle=36 https://linear.new/team/EU/new?cycle=focus+on+bugs |
Label | Use a comma between each label you want to apply | https://linear.new/team/LIN/new?label=bug https://linear.new?labels=bug,android,comments |
Project | Can be set by | https://linear.new/team/LIN/new?project=Project+page+improvements |
Milestone | Can be set by Project milestone can be read only if | https://linear.app/team/LIN/new?project=Project+page+improvements&projectMilestone=Beta |
Links | URL encoded comma delimited urls with optional title, in format | https://linear.new/team/LIN/new?links=https%3A%2F%2Flinear.app%2Chttp%3A%2F%2Fgoogle.com%7CGoogle |
Template | Can be set by |
Create a URL from a template
- Go to Settings > Team > Templates
- Click the three dots to the right of the template
- Select Copy URL to create issue from template
Copy a URL from an issue
While on an issue’s view, or an issue is highlighted or selected, open command bar by typing Cmd/Ctrl + K and select Copy pre-filled create issue URL to clipboard.
Drafts
When writing an issue and navigating away to another part of the app, Linear will hide the issue modal and keep a temporary draft. The next time you go to create an issue, the editor will re-open with the previous content draft. This type of draft is saved locally and only available on the client used to create it. Logging out, restarting, or resetting Linear will clear this type of draft.
If you use Esc or click on the close button, a pop-up modal will appear giving you the option to save the issue as a draft. This draft type persists across clients and will not clear on logout or reset. To access your saved drafts, open the Drafts page in your sidebar.
Drafts are stored for 6 months before being deleted automatically
FAQ
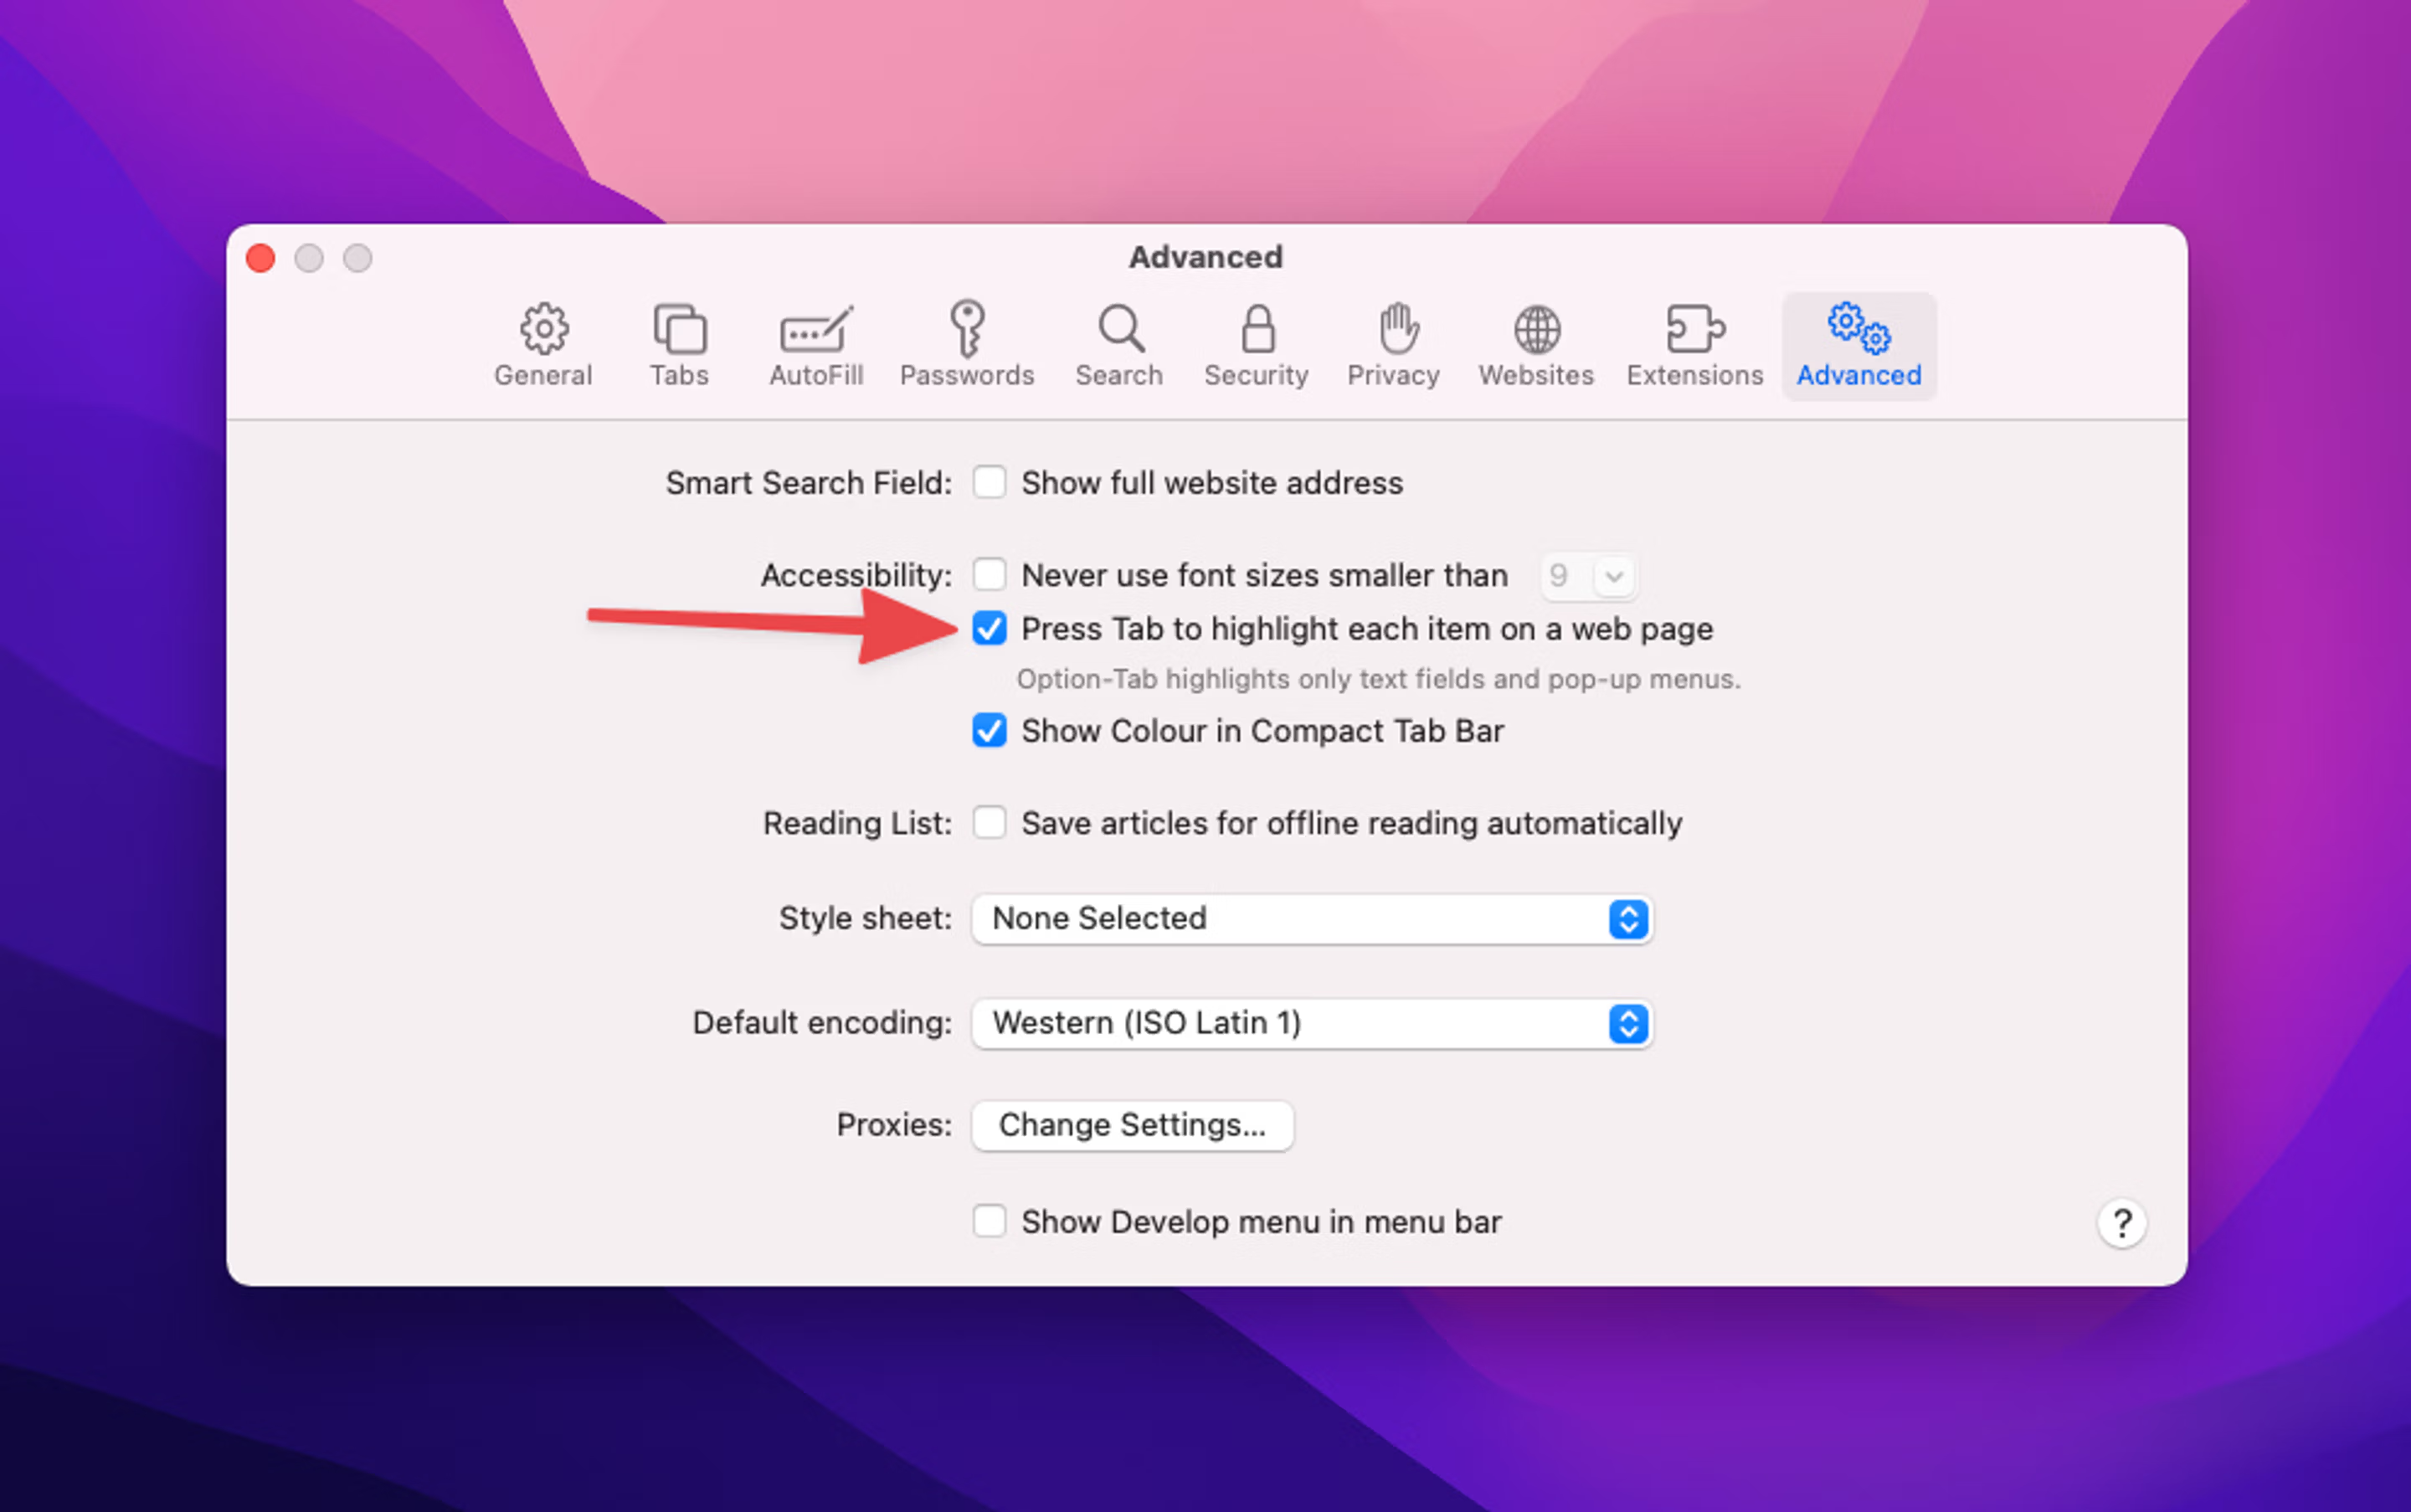
If Safari is stealing your focus when hitting tab during issue creation, enable this Safari advanced preference:
Safari > Preferences > Advanced > Enable “Press tab to highlight each item on a webpage”.